super yummy gluten free vegan baked fruit cheesecake

Photo 26-07-2013 14 27 03

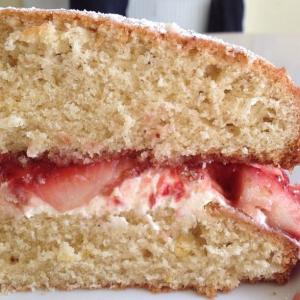
Super Yummy Gluten Free Vegan Baked Fruit Cheesecake

After embarking on my quest for healthy goodness I have been determined to find yummy desserts.  This.  Is,  SO.  GOOOOOOD!  My lovely friend Jake introduced me to this when he made it for me last week and I’ve been raving about it since – I even baked it for my housemates a couple of days ago 🙂

Although the original recipe is not vegan, after a few tweaks to replace the dairy and eggs (see the version below) it was super simple to make and came out pretty darn well if I say so myself!  If you’re unsure of where to buy the gluten free / vegan ingredients you can click on them to be taken to where I sourced them from.

Ingredients

For the biscuit base

For the cheesecake filling

  • 220g cream cheese (substitute for 220g dairy free cream cheese)
  • 112g caster sugar
  • 2 medium eggs (substitute for 2 tsp gluten free natural egg replacer mix and 4 tbs water)
  • 15g cornflour
  • a few drops vanilla extract
  • 50g fruit of choice (raspberries all the way for me although this recipe is definitely getting tested with lemon zest next time I bake it)

Method

  1. Preheat the oven to 180°c / 350°f / gas mark 4.
  2. Grease an 8in / 20cm round spring form cake tin (you only need a shallow one) or flan ring
  3. Stir together the gluten free flour, desiccated coconut, ground almonds, caster sugar and gluten free baking powder.
  4. Rub the butter into the flour mixture until it resembles breadcrumbs, then mix to a dough.
  5. Press into the greased tin then place on a flat baking tray and bake for 15 – 20 minutes until golden brown.
  6. (You can use this for the base or for a richer base – melt 50g unsalted butter (or soya spread), stir in the cooked biscuit and press back into the cake tin and place into the fridge to set.)
  7. Prepare your fruit and place on the bottom of the cooked tart base.
  8. To prepare the cheesecake filling beat the cream cheese to soften.
  9. Add the rest of the ingredients and beat until smooth.
  10. Pour over the fruit and bake in the oven for 25 minutes until firm.
  11. Leave to cool then store in the fridge until required. This will also freeze very well.
  12. To serve, run a sharp knife around the edge to loosen the ring and take off

Enjoy!

big love

gollygoshgirl

xx

homebaked Barbie Christening cake

Homebaked Barbie Christening cake

Photo 19-07-2013 18 11 56 - Copy

Barbie christening cake covered in fondant and finished with sugarpaste detailing The bottom tier is vanilla sponge with strawberry jam and vanilla buttercream, the middle tier is marble sponge with chocolate fudge buttercream and the top tier is chocolate fudge sponge with chocolate fudge buttercream.

For how to create a Barbie cake (the top tier) see my previous post or to see more of my homebaking and cake decorating posts click here or take a peek at my instagram here 🙂

Enjoy!

big love

gollygoshgirl

xx


homebaked strawberries and cream white chocolate sponge cake with fresh fruit

Strawberries And Cream White Chocolate Sponge Cake With Fresh Fruit

Summer has finally arrived in the UK (THANK YOU LORD!) and the Wimbledon tennis final this weekend coupled with glorious sunshine inspired me to bake this little edible ode to British summertime 🙂  The cake is for a very good friend’s birthday and she requested strawberry jam and white chocolate so I adapted my classic Victoria sponge recipe and added a few extras  to enhance those flavours.  Below is the finished product and recipe – and here’s to a long hot summer (pretty please)!!

Photo 07-07-2013 01 33 29

Ingredients

  • 340g Unsalted butter (plus a little bit extra for greasing)
  • 340g Self-raising flour (plus extra for dusting)
  • 340g Caster sugar (plus 2 tbs for the filling)
  • 6 Large eggs
  • 2 Lemons
  • 400g Fresh strawberries
  • 80g Fresh blueberries
  • 80g Fresh raspberries
  • 2 tsp vanilla extract
  • 150g Good quality strawberry jam (plus 1 heaped tbs to attach the fruit when decorating)
  • 70g White chocolate chips
  • 60g white chocolate (to be grated)
  • 220ml Double cream
  • Icing sugar, for dusting
  • Mint leaves, to garnish

Method

  1. Preheat the oven to 180ºC/350ºF/gas 4
  2. Grease the bottom and sides of two 20cm and two 13cm sandwich cake tins with butter.  Line the base of each tin with greaseproof paper then dust the sides lightly with flour
  3. Beat 225g butter and 225g sugar together until very light and fluffy
  4. Add four eggs one at a time, beating each one in well before you add the next
  5. Sift in 225g flour
  6. Finely grate over the zest of 1 lemon then fold it into the mixture (halve the lemon and save it for later)
  7. Divide the cake mix into the prepared 20cm cake tins and put to one side
  8. In a separate bowl beat 115g butter and 115g sugar until very light and fluffy
  9. Add two eggs one and a time, beating the first one in well before you add the second
  10. Sift in 115g flour
  11. Finely grate over the zest of half a lemon then fold it into the mixture (halve the lemon and save it for later)
  12. Divide the mixture into the prepared 13cm cake tins
  13. Bake all four cakes in the hot oven for around 20 minutes, or until lightly golden brown and risen. The smaller cakes may be ready after 15-18 minutes.  (You can check to see if the cake is cooked by sticking a cocktail stick or skewer right into the middle of the sponge;  remove it after 5 seconds and if it comes out clean the cake’s cooked; if slightly sticky it needs a bit longer, so put it back into the oven)
  14. Allow the cakes to cool slightly in the tins, then carefully turn them out on to a rack to cool completely
  15. Hull and slice 300g of your strawberries
  16. Gently warm the jam in a pan over a low heat then remove from the heat and stir in your sliced strawberries and add in the white chocolate chips
  17. Add the cream to a bowl with 2 tbs caster sugar and 2 tsp vanilla extract, then squeeze in the juice from your zested lemons
  18. Finely grate in the white chocolate 
  19. Whip the mixture until you have nice soft peaks
  20. Place the least attractive 20cm sponge cake on a  plate or cakeboard, smear over 2/3 of the jam and strawberry mixture, then spread 2/3 of the sweetened cream over the top
  21. Place the second 20cm cake (with the best side facing up) on top and dust it with icing sugar
  22. Spread a little of the tbs strawberry jam reserved for decorating onto the middle of top of the cake 
  23. Place the least attractive 13cm sponge on top, smear over the remaining jam mixture and sweetened cream then finish by placing the second 13cm cake (best side facing up) on top and dusting it with icing sugar
  24. Decorate the cake with the remaining fruit, using the reserved strawberry jam to attach it
  25. Garnish with mint leaves

Enjoy!

big love

gollygoshgirl

xx

To see more of my homebaking posts click here to check out my instagram here.


homebaked vanilla and chocolate Victoria sponge marble cake

Homebaked Vanilla & Chocolate Victoria Sponge Marble Cake

This is another twist to the classic British tea-time homebaked classic Victoria sponge recipe I bake a whole lot.  I follow Jamie Oliver’s original recipe with a couple of teensy adjustments to adapt it into a marble cake – check out my version below!  If you’d like to see a different  twist on this yummy traditional sponge give this post a little peek 🙂

Photo 02-07-2013 16 47 15

Ingredients

  • 225g Unsalted butter (plus a little bit extra for greasing)
  • 225g Self-raising flour (plus extra for dusting)
  • 225g Caster sugar
  • 4 Large eggs
  • 2 tsp Vanilla extract
  • 1 tsp Cocoa powder
  • 200g Vanilla or chocolate buttercream icing
  • 250g fresh strawberries or raspberries
  • Any additional toppings (completely optional – this is super yummy as it is!)

Method

  1. Preheat the oven to 180ºC/350ºF/gas 4
  2. Grease the bottom and sides of two 20cm sandwich cake tins with butter.  Line the base of each tin with greaseproof paper then dust the sides lightly with flour
  3. Beat the butter and sugar together until very light and fluffy
  4. Add the eggs one at a time, beating each one in well before you add the next
  5. Mix in the vanilla extract
  6. Sift in the flour and fold it into the mixture
  7. Take 8 tablespoons of the mixture and put it in a separate bowl
  8. Divide the cake mix (minus the 8 tablespoons you just took out) equally into the prepared tins
  9. Add the cocoa powder to the 8 tablespoons of separated mixture and combine
  10. Divide the chocolate mixture between the two tins containing the original vanilla mixture then use a spoon to gently swirl it around a couple of times (creating a ‘marble’ effect)
  11. Bake in the hot oven for around 20 minutes, or until lightly golden brown and risen. (You can check to see if the cake is cooked by sticking a cocktail stick or skewer right into the middle of the sponge;  remove it after 5 seconds and if it comes out clean the cake’s cooked; if slightly sticky it needs a bit longer, so put it back into the oven)
  12. Allow the cakes to cool slightly in the tins, then carefully turn them out on to a rack to cool completely
  13. Slice your strawberries or raspberries (leave a couple of the most attractive berries whole if you wish to use them on the top of the cake)
  14. Place the least attractive sponge cake on a  plate, smear over the buttercream icing and prepared berries
  15. Place the second cake (with the best side facing up) on top and serve as it is, dust it with icing sugar and add few berries to the top or go crazy and add whatever you fancy – the one in the photo above is iced in chocolate fudge buttercream and decorated with fondant flowers and flavoured buttons

Enjoy!

big love

gollygoshgirl

xx

To see more of my homebaking posts click here or check out my instagram here.

yummy healthy dessert that feels super indulgent

Photo 30-06-2013 15 47 36

Yummy Healthy Dessert That Feels Super Indulgent

As I continue on my quest for healthy goodness I am determined that I will not compromise taste or completely give up on dessert.  I flipping love fruit but sometimes I want something a bit more substantial to satisfy my (very demanding) sweet tooth!  Cue this little number – super tasty and fully of goodness 🙂

Ingredients

Serves one

  • 2 Berry oatcakes ( I use Nairns gluten free)
  • 5 tbsp Soya yoghurt
  • Handful of blueberries or blackberries
  • 4 Strawberries
  • 1 tbsp grated Dark chocolate or dark chocolate chips

Method

  1. Crumble the oatcakes
  2. Mix the blueberries or blackberries into the yoghurt
  3. Dice the strawberries
  4. Layer the prepared ingredients and the dark chocolate as desired
  5. Grab a teaspoon (smaller spoon makes me feel like I’m eating more) and dig in!

Enjoy!

big love

gollygoshgirl

xx

homebaked healthy almond butter cookies with dark chocolate chips

Photo 28-06-2013 19 15 12

Homebaked Healthy Almond Butter Cookies with Dark Chocolate Chips

Well as you may have realised, my quest for healthy goodness had led me to approach food a little differently.  It has not, however, cured my very sweet tooth.  I know there are a hundred things you are advised to do which will curb your cravings (brush your teeth, eat an apple, distract yourself with a different activity etc etc) BUT sometimes; a girl just.  needs.  chocolate.  And cookies.  And these really hit the spot! These are my second foray into cookies healthy-style and you know what? I much prefer them to the chocolate chip ones I posted a week ago.  Yum 🙂  I found the original recipe on Facebook but there was no source given (apologies if it’s yours – let me know and I’ll give you the credit you deserve!) however as usual I gave it a few tweaks!  Below is my version…

Ingredients

Makes 8 cookies or 16 bitesize cookies

  • 1 1/4 cups canned chickpeas (I just used the whole 400g tin, which is 260g when drained)
  • 2 teaspoons vanilla extract
  • 1/2 cup + 2 tbspns (165g) natural almond butter
  • 1/4 cup (80g) agave nectar or honey
  • 1 tspn baking powder (I use gluten free)
  • 1/2 cup dark chocolate chips (70% cocoa solids)

Method

  1. Preheat the oven to 180ºC/350ºF/gas 4
  2. Line your baking trays with greaseproof paper
  3. Drain the chickpeas, rinse them well then make sure there is as little excess water as possible one them.  (It is suggested you pat them dry with a piece of kitchen paper but to be honest I didn’t bother).
  4. Put the chickpeas in a food processor and process until smooth (looking kind of a little bit like moist ground almonds)
  5. Mix all of the ingredients together except the chocolate chips
  6. Add the chocolate chips
  7. The mixture should be pretty sticky.  Using wet hands, form the cookies or cookie bites and place onto the lined baking trays.
  8. Bake in the oven for 10-13 minutes.
  9. Let the cookies cool on the baking trays for a few minutes before cooling on a wire rack.  When they first come out of the oven they are very soft but firm up as they cool.

Enjoy!

big love

gollygoshgirl

xx

homebaked afternoon tea

549892_10151558472484714_1707712958_n (1)


On my best friend’s birthday we usually go out for afternoon tea but this year I wanted to switch it up a little bit and decided to attempt to bake it instead. 

Above is the result;

  • Sandwiches (egg and cress, cheese, cucumber, ham)
  • Scones with clotted cream and strawberry jam
  • Macaroons with summer fruits filling (recipe here)
  • Chocolate brownie bites (recipe here)
  • Banana loaves with toffee topping and white chocolate curls (recipe here)
  • White chocolate and raspberry cheesecakes (recipe here)
  • Classic Victoria sponge cake with vanilla cream and fresh strawberries (recipe here)
  • Fresh fruit (blueberries, blackberries and grapes)
  • Pink champagne
  • Earl grey tea

Enjoy!

big love

gollygoshgirl xx


homebaked strawberries and cream macaroons

Photo 15-06-2013 01 14 03

Homebaked Strawberries & Cream Macaroons

My dad is awesome.  He wears socks with sandals every day (literally.  all  year  round), loves dressing up as Santa at Christmas, tells jokes so rubbish they’re good, recycles everything, invents his own abbreviations for texting (which are usually completely undecipherable) and ‘assumes the position’ every Sunday after lunch (sleeps in the armchair).  There are a lot of other reasons he’s pretty cool but I think you get the picture!  Anyway; as today is Father’s Day I asked him if he wanted any edible treats – and he requested macaroons.  Which leads us nicely into the rest of this post!

I always use this recipe and it works perfectly every time (hooray!) but I wanted to try something slightly different; so I decided to add a little twist and change the flavours up a little.  I followed my homebaked macaroons recipe but added 1 1/2 teaspoons vanilla extract to the macaroon mixture and didn’t use any food colouring.  I added 1 teaspoon vanilla extract and finely grated white chocolate to the filling.  I then separated it into 6 parts, using a different food colouring to dye each one.  When I sandwiched the macaroons together I added finely sliced strawberries to the middle.  To complete the rainbow aesthetic started with the different coloured fillings; I dyed white fondant the same 6 colours as the fillings and used a star cutter to make the little toppers, attaching them with a very small amount of edible glue.

Hopefully they’ll taste yummy – I’ll be taking them over in a few hours!  Happy Father’s Day Dadsy 😀

Photo 15-06-2013 18 03 00

big love

gollygoshgirl

xx

To see more of my homebaking click here or check out my instagram 🙂

healthy homebaked chocolate chip cookies (yep; you heard right!)

Photo 14-06-2013 23 45 47

Healthy Homebaked Chocolate Chip Cookies

To cut a long story short; I’ve been throwing myself a pity party for the past week.  I was told I can’t eat gluten, dairy, eggs or yeast for the foreseeable future – possibly forever.  My favourite foods flashed around a conveyor belt in my mind (desserts featuring pretty highly), quickly followed by the realisation that I needed to find some good substitutions as speedily as possible!  All recipes I could find for cookies and cakes seemed to want me to grind nuts (not gunna happen considering that my trusty £5 electric whisk from Argos is my only real equipment) or require a massive amount of substitute ingredients which aren’t readily available or affordable.  I stumbled across the original recipe on pinterest and emailed it to myself but  I cannot for the life of me find the source (if anyone knows it please get at me!).  As usual, I have  made a few little changes – my version is below!  These come out pretty rich but you know what? They also taste surprisingly good!

Ingredients

Makes 16 cookies

  • 1 small Avocado
  • 3/4 cup Honey (for vegans substitute honey for 1/2 cup agave nectar, 2 tbsps soya milk and 1 mashed banana)
  • 1/2 cup Soft light brown sugar, packed
  • 2 tsp Vanilla extract
  • 2 cups Rice flour
  • 1/2 cup Cocoa powder
  • 1/2 tsp Salt
  • 1/2 tsp Bicarbonate of soda
  • 1/2 tsp Cornflour (UK) or cornstarch (US)
  • 2 tbsps Soya milk
  • 1 and 1/2 cups dark chocolate chips (70% cocoa solids)

Method

  1. Slice, pit and mash the avocado.
  2. Place the avocado into a mixing bowl and combine it with the honey.
  3. Add the sugar, soya milk and vanilla extract, mixing until combined.
  4. In a separate bowl sift together flour, cocoa powder, chocolate chips, salt, bicarbonate of soda, baking powder and cornflour.
  5. Slowly mix in the wet ingredients a little at a time.
  6. Chill in the fridge for 2-36 hours.
  7. Preheat the oven to 180ºC/350ºF/gas 4
  8. Line your baking trays with greaseproof paper
  9. Roll the mixture into mounds the size of a heaped tablespoon and place onto the baking trays lined with greaseproof paper.
  10. Flatten the mounds of mixture slightly, creating discs.
  11. Bake in the oven for 10-13 minutes.
  12. Let the cookies cool on the baking trays for 5 minutes before transferring to a wire rack to cool.

Enjoy!

big love

gollygoshgirl

xx

baked red peppers stuffed with goodness

Photo 12-06-2013 21 29 37

Baked Red Peppers Stuffed With Goodness

These.  Are.  Yummy. Fact.  AND they’re super full of nutrients to make your body smile from the inside out!

Since embarking on a quest for healthy goodness at the beginning of April one major thing I’ve noticed (probably very belatedly compared to everyone else) is how many cheeky little unhelpful added extras there are to food that I had thought was pretty good for me!  I’ve certainly discovered the value (and reaped the results) of cooking from scratch using only the good stuff!  It took a fair amount of scouring food labels at the start but I’ve started to work out what is literally what it says on the tin and what is actually a chemically or sugar enhanced flavour.  And my tastebuds can now certainly notice the difference!

The problem is, you don’t want to sacrifice flavour (I wouldn’t have the willpower to anyway!) in pursuit of nutrition or it will make you miserable and simply crave the taste of sugar and fat.  So I started to experiment a little bit with foods I know are full to the brim of nutrients and other goodness, and to come up with meals that taste yummy, are within my price range and that I can prepare in bulk to freeze in my trusty tupperware.

These are my current favourite (recipe below) but my meal prep also includes yummy, filling and crazy healthy stir frys and super food salads amongst others for lunches to take to work.

Ingredients

  • 6-8 Red bell peppers
  • 800g Lean turkey mince or lentils
  • 100g Quinoa
  • 400ml Carton of passata
  • 400ml Can of mixed pulses
  • 175g Can of sweetcorn
  • 2 Sweet potatoes
  • 150g Butternut squash (optional)
  • 2 Cloves garlic
  • 1 Onion
  • Oregano (fresh or dried)
  • 50g Kale, Spinach or a mixture of the two
  • Lemon juice

Method

  1. Preheat the oven to 180°C
  2. Put the quinoa into a pan of boiling water for 15-18 minutes until cooked, then drain the water.
  3. Chop the sweet potatoes (and butternut squash if you have it) into small chunks (about 1cm big) then place them onto a baking tray lined with greaseproof paper.  You don’t need any oil – promise!  Don’t put them in the oven just yet – that comes a little later.
  4. De-seed and halve the red bell peppers (if using for meal prep you need to halve them to fit into tupperware – if you’d prefer them whole like in the picture then go for it – the recipe is the same!) and place them on a baking tray with the inside facing upwards.  Again, no oil needed.
  5. Chop the onion and garlic, then pop them into a frying pan on a medium-high heat with about 2 tablespoons of lemon juice for a couple of minutes
  6. If you are using meat add in the turkey and stir until cooked
  7. Add in the oregano
  8. Add the passata, mixed pulses, sweetcorn (and lentils if using) and stir for a few minutes
  9. Finally add the cooked quinoa and kale/spinach for a few minutes and stir well
  10. Spoon the cooked mix into the prepared bell peppers
  11. Place the baking trays with the bell peppers into the oven along with the baking tray of sweet potato and butternut squash.
  12. Cook for 30-35 minutes.
  13. Leave everything on the baking trays to cool for a couple of minutes then transfer the bell peppers to plates or tupperware.
  14. Add the baked sweet potato and butternut squash.

Enjoy!

big love,

gollygoshgirl

xx


homebaked Barbie cake


Homebaked Barbie cake

…So one of the girls turned up to school at 9am with a pink cakeboard and two packs of fondant icing announcing she needed to make a cake for a four year old’s birthday by 1.30pm when school finished. This is my second attempt at a Barbie cake (my first attempt is pictured at the end of this post); this is the homebaked chocolate cake with chocolate ganache we created…

291938_10151698888504714_277435609_n


Ingredients

  • 3 Layers of 8 inch homebaked chocolate sponge cakes, sandwiched together with chocolate ganache
  • 200-250g Vanilla buttercream icing
  • 10 inch cakeboard
  • Barbie torso (you can buy these in cake shops)
  • 8cm ribbon to style Barbie’s hair
  • Edible glue
  • 2.5g Pot of edible glitter (2 pots if you won’t be super-careful at making it last for the whole cake)
  • Handmade fondant icing bow (approx 10cm x 4cm)
  • 500g White fondant icing (plus 150g extra if you want to create a ‘train’)
  • 650g fondant icing for main dress (pale pink in the photo)
  • 250g fondant icing for the corset and top of dress (bright pink in the photo)
  • Ribbon or edible gems / flowers / sugarpaste roses to decorate

Method

  1. Sandwich your three layers of sponge cake with the chocolate ganache
  2. Using a knife, shape your sponge tower to resemble a dome
  3. Cover in vanilla buttercream
  4. Using the white fondant icing, cover the cake entirely
  5. Create your fondant icing bow
  6. Create a ‘corset’ for the Barbie torso (it is easier to shape once on the torso and I remove the arms to make it easier)
  7. Create a ‘top layer’ of fondant icing for the dress of whatever design you wish
  8. Using the edible glue; cover the bow, corset and top layer for the dress in edible glitter
  9. Style the Barbie’s hair
  10. Roll out the icing for the base of the dress and cover the cake with it, making sure not to make the icing smooth all the way to the bottom – create folds to enhance the image of a dress.  Trim the icing at the bottom to resemble the shape of the dress hem you want
  11. Attach the top layer of the dress using a little buttercream or edible glue
  12. Insert the Barbie torso into the top middle of the cake
  13. Decorate where the torso meets the top of the dress as desired (ribbon, edible flowers etc)
  14. If desired create and attach a ‘train’ for the dress
  15. Using edible glue, attach the fondant bow
  16. Finish off with any decorations you choose

Enjoy!

big love

gollygoshgirl

xx

p.s. to see more of my homebaking and cake decorating posts click here or take a peek at my instagram here

559772_10151550266304714_1519843300_n


homebaked chocolate brownies

66914_10151555874429714_2136978527_n (1)

Homebaked Chocolate Brownies

Whenever I introduce the kids I work with to baking these are always the first thing we make; a simple recipe that produces moist, yummy and great looking results every time!  Another Jamie Oliver recipe with a few little adjustments (my version below) – I’m a big fan of his!  You can also add in different little extras to suit your taste – mine always involve extra chocolate chips but chopped nuts, marshmallows, orange zest and dates have also featured in various attempts along the way and the end results were always eaten up pretty swiftly! The brownie in the photo is served with crème fraîche  and orange zest but raspberry coulis or ice cream and fresh raspberries/strawberries are also a firm favourite!

Ingredients

  • 300g good-quality dark chocolate (70% cocoa solids) – as good a quality as you can afford
  • milk and dark chocolate chips
  • 250g unsalted butter
  • 80g cocoa powder
  • 65g plain flour
  •  1 tsp baking powder
  • 350g caster sugar
  • 4 large eggs

Method

  1. Preheat the oven to 180ºC/350ºF/gas 4
  2. Line a 20 x 30cm rectangular baking tin with greaseproof paper
  3. Break the chocolate into small pieces and place it in a large bowl over some simmering water
  4. Add the butter, melting it with the chocolate and mix until smooth
  5. In a separate bowl, mix together the cocoa powder, flour, baking powder and sugar
  6. Add the butter and chocolate mixture and stir well
  7. Beat the eggs and then mix them in until you have a silky consistency
  8. Add the chocolate chips
  9. Pour your brownie mix into the baking tray, and place in the oven for around 25 minutes.  The brownies should be slightly springy on the outside but still gooey in the middle.  Yum!  You don’t want to overcook them so – unlike cakes – you don’t want a skewer to come out all clean.
  10.  Allow to cool in the tray, then carefully transfer to a large chopping board and cut into chunky squares

Enjoy!

big love

gollygoshgirl

xx

To see more of my homebaking posts click here to check out my instagram here.

a little twist on the classic Victoria sponge

Fresh strawberries and vanilla buttercream sandwiched between chocolate fudge sponge cake and iced in chocolate. Decorated with strawberries and vanilla icing.  For a yummy recipe for traditional Victoria sponge cake check my previous post 🙂

424581_10151724934614714_819495074_n

To see more of my homebaking click here to go to my other posts or here for my instagram.

big love

gollygoshgirl

xx

homebaked classic Victoria sponge cake

Classic Victoria Sponge Cake With Fresh Cream And Strawberries

When I think classic British tea-time cake Victoria sponge springs to mind.  This recipe has never let me down and the lemon in it flippin’ works!  I follow Jamie Oliver’s original recipe (copied out below) and for once don’t make any adjustments – as you can see by the pictures it comes out pretty good!  If you’d like to see my little twist on this yummy traditional sponge give this post a little peek 🙂

544253_10151596064459714_113094131_n602945_10151567454204714_1041750068_n (1)

Ingredients

  • 225g Unsalted butter (plus a little bit extra for greasing)
  • 225g Self-raising flour (plus extra for dusting)
  • 225g Caster sugar (plus 1 tbspn for the filling)
  • 4 Large eggs
  • 1 Lemon
  • 250g Fresh strawberries
  • 1 tsp vanilla extract
  • 150g Good quality strawberry jam
  • 150ml Double cream
  • Icing sugar, for dusting

Method

  1. Preheat the oven to 180ºC/350ºF/gas 4
  2. Grease the bottom and sides of two 20cm sandwich cake tins with butter.  Line the base of each tin with greaseproof paper then dust the sides lightly with flour
  3. Beat the butter and sugar together until very light and fluffy
  4. Add the eggs one at a time, beating each one in well before you add the next
  5. Sift in the flour
  6. Finely grate over the lemon zest then fold it into the mixture (halve the lemon and save it for later)
  7. Divide the cake mix into the prepared tins then bake in the hot oven for around 20 minutes, or until lightly golden brown and risen. (You can check to see if the cake is cooked by sticking a cocktail stick or skewer right into the middle of the sponge;  remove it after 5 seconds and if it comes out clean the cake’s cooked; if slightly sticky it needs a bit longer, so put it back into the oven)
  8. Allow the cakes to cool slightly in the tins, then carefully turn them out on to a rack to cool completely
  9. Hull and slice your strawberries
  10. Gently warm the jam in a pan over a low heat then remove from the heat and stir in your sliced strawberries.
  11. Add the cream to a bowl with the sugar and vanilla extract, then squeeze in the juice from your zested lemon
  12. Whip the mixture until you have nice soft peaks
  13. Place the least attractive sponge cake on a  plate, smear over the jam and strawberries, then spread the sweetened cream over the top
  14. Place the second cake (with the best side facing up) on top and dust it with icing sugar

Enjoy!

big love

gollygoshgirl

xx

To see more of my homebaking posts click here to check out my instagram here.

white chocolate and raspberry cheesecake

Y7SNESTjtUIrddQy3sIu4ei2tJsZtXOj7jMT3urzGSk

White Chocolate and Raspberry Cheesecake

Quite possibly one of my favourite desserts (chocolate, biscuits AND fruit – what’s not to love?!?) and super simple to make!  My sister introduced me to the original recipe here which is flippin’ tasty but as with most recipes I tweak it a little 🙂 Below is my version – let me know what you think!

Ingredients

For the biscuit base

  • 150 g dark chocolate covered digestive biscuits, crushed
  • 75 g butter, melted
  • 3 tbsp good quality raspberry jam

For the filling

  • 600 g white chocolate, broken into pieces
  • 65 g butter
  • 1 tsp vanilla essence (or more to taste)
  • 500 g cream cheese
  • 50 g caster sugar
  • 180 ml whipping cream
  • 1 punnet raspberries, plus a few more to decorate

Method

  1. Crush the biscuits.
  2. Melt the butter then stir it into the crushed biscuits, adding a teaspoon of raspberry jam to the mixture.
  3. Press the mixture onto the base of a 23cm springform tin.
  4. Spread the jam evenly on top of the biscuit base and place the base in the fridge whilst preparing the filling.
  5. Put the chocolate, butter and vanilla essence in a heatproof bowl set over a pan of simmering (not boiling) water until melted. (I like to leave a few little lumps of white chocolate that hasn’t quite melted but it’s  up to you!)
  6. In another bowl mix together the cream cheese, sugar and whipping cream to a smooth consistency.
  7. Stir the melted chocolate mixture into the cream mixture. Gently stir in the raspberries, being careful not to release the juice.
  8. Spoon the mixture on top of the biscuit base and place in the fridge to set for 8-24 hours.
  9. When you’re ready to serve, decorate with a few whole raspberries.

Enjoy!

big love

gollygoshgirl

xx

p.s. If you fancy a little look at any more of my homebaking take a peek at my instagram or check out a few of  my other treat-related posts.

homebaked Despicable Me minion birthday cake

Despicable Me is SUCH an awesome film and after spotting a couple of minion birthday cakes posted by Geraldine a few days ago, I couldn’t resist having a little go at creating one myself.  The friend who introduced me to the movie celebrates his birthday this week so it would’ve been rude not to! Below is the result; four layers of homebaked chocolate sponge layered with chocolate fudge icing, fresh raspberries and white chocolate chunks then covered in fondant icing.

Picture1

big love.

gollygoshgirl

xx

p.s. If you fancy a little look at any more of my homebaking take a peek at my instagram or check out a few of  my other treat-related posts.

homebaked banana loaf

EdF4T2ExBMoyK2dK2StAqXJoRaYKF6lOG8xJHje-FRIIL5h081FUMq_1l54DZyanab0qzDO53J_2qxQrGDbi5wNmwQX5vcqbxBfUzZr8aue5sF95-UcmesHhx0L3cGp2o


Homebaked Banana Loaf

This recipe is from the Hummingbird Bakery and makes the most flippin’ yummy banana loaf ever  – friends and family are always asking me to bake it 🙂 I pretty much follow the recipe in their cookbook but with a couple of little tweaks here and there.  The only thing to be a bit careful of is oven temperature – I find the one given below is a little too hot for the loaf to cope with in my oven so normally aim for a tad cooler than the recipe recommends.  I also use really ripe bananas because they make the loaf a lot more moist.  Its pretty darn scrummy by itself, but I have used combinations from toffee sauce, cream cheese icing, white chocolate curls and vanilla icing to top loaves – all of which work well!

Ingredients

  • 270g Light muscovado sugar
  • 2 Eggs
  • 200g Peeled bananas
  • 280g Plain flour
  • 140g Unsalted butter
  • 1 tsp Baking powder
  • 1 tsp Bicarbonate of soda
  • 1 tsp cinnamon

Method

  1. Pre-heat the oven to 170°C (Gas Mark 3)
  2. Grease a 23cmx13cm loaf tin and dust with flour.
  3. Beat the sugar and eggs together in a bowl until fully incorporated
  4. Mash the bananas and then add them to the mixture
  5. Add the flour, baking powder, bicarbonate of soda and cinnamon and mix them in
  6. Melt the butter and then add to the mixture, mixing well until all of the ingredients are fully incorporated
  7. Pour the mixture into the prepared loaf tin and bake in the oven for up to an hour, until firm to the touch and a skewer inserted into the centre comes out clean. (I usually check after around 45 minutes and gauge it from there)
  8. Leave the loaf to cool in the tin for a few minutes then turn it out onto a wire cooling rack to cool completely
  9. Either serve it as it is or add toppings of your choice.

Enjoy!

big love

gollygoshgirl

xx

p.s. If you fancy a little look at any more of my homebaking take a peek at my instagram or check out a few of  my other treat-related posts.

macaroons – perfect every time!

w1lQE7IyDnDconXA5EG5KoQa1A8h9DUmXlZzRd5X6q02CDxLkcP0EBtzoQuBH2zRiiUMjHQsBGnaAj0vhSfaGkRBs36MOr8AEYAbFVLRblc8i_jItynSvSH0rnrXnwLzM

Homebaked Macaroons

One of my best friends introduced me to this recipe, originally intended for those blessed to own an AGA.  She found the original recipe here which is pretty awesome, although personally I needed to adjust it a teensy bit as I have an oven and added in a couple of steps (on her advice) – detailed below.

If you fancy a little look at any more of my homebaking take a peek at my instagram or check out a few of  my other treat-related posts.

Ingredients

  • (Makes 18 macaroons)
  • 3 Egg whites
  • 55g Caster sugar
  • Food colouring of your choice
  • 200g Icing sugar, sieved
  • 125g Ground almonds
  • 300ml Double cream (for the filling)
  • Blended fruit (or thick fruit sauce of your choice) to taste (for the filling)
  • Food colouring (for the filling)

Method

  1. Pre-heat the oven to 180°C (Gas Mark 4)
  2. Beat the egg whites until they reach the ‘soft peak’ stage, then whisk in the caster sugar until it has dissolved.  Whisk in the food colouring.
  3. Mix the icing sugar and ground almonds together in a separate bowl, then fold into the mixture from step 1.  Place this mixture into a piping bag with a 1¼cm plain nozzle.
  4. Pipe rounds on to baking paper placed on a baking sheet, about 2 cm apart.
  5. Tap/drop the baking sheet on the worktop to level off the mixture. Leave to stand for 30 minutes until no longer sticky.  (This is SO the most important step – it’s what creates the feet on the macaroons!)
  6.  Place in the oven and cook for 15-20 minutes until firm.
  7. Once taken out of the oven, leave the cooked macaroons for 5 minutes then move them to a cooling rack.
  8. For the filling, whip the cream and fold in the fruit.
  9. Once the macaroons are completely cool, sandwich them together with the filling

Enjoy!

big love

gollygoshgirl

xx

homebaked sausage rolls

Photo 22-05-2013 23 58 20

Sausage Rolls

These are probably the best sausage rolls I’ve ever tasted.  Fact.  Even my housemates agree and they can be a pretty tough crowd!  AND they’re easy-peasy to make! I discovered this recipe on Jamie Oliver’s home cooking skills website, which I use to teach some of the learners at school – SO worth a look (and there are handy little step-by-step pictures on there too) 🙂

The other great thing about these sausage rolls is that you can freeze them uncooked; just wrap them in clingfilm and pop in the freezer. Remove them from the freezer when you need them and cook from frozen at 220ºC/425ºF/gas 7 for 25 to 30 minutes or until golden, crisp, puffed up and the sausage meat is cooked through

Ingredients

  • (makes 16 sausage rolls)
  • 6 good-quality Cumberland sausages (approx 400g), the best quality you can afford
  • 1 lemon
  • Plain flour, for dusting
  • 500g good-quality all butter puff pastry
  • 1 egg
  • A splash of milk

Method

  1. Preheat the oven to 220ºC/425ºF/gas 7
  2. Using a small sharp knife, cut a slit in each of the sausages
  3. Rip off and discard the skins, put the sausage meat into a bowl
  4. Finely grate the zest of the lemon into the bowl
  5. Scrunch and mix everything together with your clean hands
  6. Lightly flour a clean work surface and a rolling pin with flour
  7. Roll your pastry out until it’s about 25cm by 35cm (like a tea towel) and just under 0.5cm thick, dusting with flour as needed
  8. Cut the sheet of pastry in half lengthways so you have two long strips
  9. Divide the sausage stuffing into two and roll each half into a sausage shape
  10. Lay each sausage shape down the centre of the pastry strips
  11. Beat the egg with a splash of milk in a small bowl
  12. Use a pastry brush to egg-wash the pastry on both sides of the sausage meat, then fold it over so the edges join up
  13. Use the back of a fork to mark and seal the pastry all the way along the join so it is tightly wrapped up
  14. Pinch the ends closed
  15. Egg-wash the top of each roll, then cut each one into 8 pieces
  16. Place on a baking tray and cook in the hot oven for around 20 minutes, or until golden, crisp, puffed up and the sausage meat is cooked through

Enjoy!

big love

gollygoshgirl

xx

p.s. If you fancy a little look at any more of my homebaking check out a few of  my other treat-related posts.

homebaked white chocolate mud cake

Homebaked white chocolate mud cake for a milkybar obsessed little boy’s first birthday

944541_10151682861189714_1772075682_n

To see more of my homebaking click here to go to my other posts or here for my instagram.

big love

gollygoshgirl

xx