super yummy gluten free vegan baked fruit cheesecake

Photo 26-07-2013 14 27 03

Super Yummy Gluten Free Vegan Baked Fruit Cheesecake

After embarking on my quest for healthy goodness I have been determined to find yummy desserts.  This.  Is,  SO.  GOOOOOOD!  My lovely friend Jake introduced me to this when he made it for me last week and I’ve been raving about it since – I even baked it for my housemates a couple of days ago 🙂

Although the original recipe is not vegan, after a few tweaks to replace the dairy and eggs (see the version below) it was super simple to make and came out pretty darn well if I say so myself!  If you’re unsure of where to buy the gluten free / vegan ingredients you can click on them to be taken to where I sourced them from.

Ingredients

For the biscuit base

For the cheesecake filling

  • 220g cream cheese (substitute for 220g dairy free cream cheese)
  • 112g caster sugar
  • 2 medium eggs (substitute for 2 tsp gluten free natural egg replacer mix and 4 tbs water)
  • 15g cornflour
  • a few drops vanilla extract
  • 50g fruit of choice (raspberries all the way for me although this recipe is definitely getting tested with lemon zest next time I bake it)

Method

  1. Preheat the oven to 180°c / 350°f / gas mark 4.
  2. Grease an 8in / 20cm round spring form cake tin (you only need a shallow one) or flan ring
  3. Stir together the gluten free flour, desiccated coconut, ground almonds, caster sugar and gluten free baking powder.
  4. Rub the butter into the flour mixture until it resembles breadcrumbs, then mix to a dough.
  5. Press into the greased tin then place on a flat baking tray and bake for 15 – 20 minutes until golden brown.
  6. (You can use this for the base or for a richer base – melt 50g unsalted butter (or soya spread), stir in the cooked biscuit and press back into the cake tin and place into the fridge to set.)
  7. Prepare your fruit and place on the bottom of the cooked tart base.
  8. To prepare the cheesecake filling beat the cream cheese to soften.
  9. Add the rest of the ingredients and beat until smooth.
  10. Pour over the fruit and bake in the oven for 25 minutes until firm.
  11. Leave to cool then store in the fridge until required. This will also freeze very well.
  12. To serve, run a sharp knife around the edge to loosen the ring and take off

Enjoy!

big love

gollygoshgirl

xx

yummy healthy dessert that feels super indulgent

Photo 30-06-2013 15 47 36

Yummy Healthy Dessert That Feels Super Indulgent

As I continue on my quest for healthy goodness I am determined that I will not compromise taste or completely give up on dessert.  I flipping love fruit but sometimes I want something a bit more substantial to satisfy my (very demanding) sweet tooth!  Cue this little number – super tasty and fully of goodness 🙂

Ingredients

Serves one

  • 2 Berry oatcakes ( I use Nairns gluten free)
  • 5 tbsp Soya yoghurt
  • Handful of blueberries or blackberries
  • 4 Strawberries
  • 1 tbsp grated Dark chocolate or dark chocolate chips

Method

  1. Crumble the oatcakes
  2. Mix the blueberries or blackberries into the yoghurt
  3. Dice the strawberries
  4. Layer the prepared ingredients and the dark chocolate as desired
  5. Grab a teaspoon (smaller spoon makes me feel like I’m eating more) and dig in!

Enjoy!

big love

gollygoshgirl

xx

homebaked healthy almond butter cookies with dark chocolate chips

Photo 28-06-2013 19 15 12

Homebaked Healthy Almond Butter Cookies with Dark Chocolate Chips

Well as you may have realised, my quest for healthy goodness had led me to approach food a little differently.  It has not, however, cured my very sweet tooth.  I know there are a hundred things you are advised to do which will curb your cravings (brush your teeth, eat an apple, distract yourself with a different activity etc etc) BUT sometimes; a girl just.  needs.  chocolate.  And cookies.  And these really hit the spot! These are my second foray into cookies healthy-style and you know what? I much prefer them to the chocolate chip ones I posted a week ago.  Yum 🙂  I found the original recipe on Facebook but there was no source given (apologies if it’s yours – let me know and I’ll give you the credit you deserve!) however as usual I gave it a few tweaks!  Below is my version…

Ingredients

Makes 8 cookies or 16 bitesize cookies

  • 1 1/4 cups canned chickpeas (I just used the whole 400g tin, which is 260g when drained)
  • 2 teaspoons vanilla extract
  • 1/2 cup + 2 tbspns (165g) natural almond butter
  • 1/4 cup (80g) agave nectar or honey
  • 1 tspn baking powder (I use gluten free)
  • 1/2 cup dark chocolate chips (70% cocoa solids)

Method

  1. Preheat the oven to 180ºC/350ºF/gas 4
  2. Line your baking trays with greaseproof paper
  3. Drain the chickpeas, rinse them well then make sure there is as little excess water as possible one them.  (It is suggested you pat them dry with a piece of kitchen paper but to be honest I didn’t bother).
  4. Put the chickpeas in a food processor and process until smooth (looking kind of a little bit like moist ground almonds)
  5. Mix all of the ingredients together except the chocolate chips
  6. Add the chocolate chips
  7. The mixture should be pretty sticky.  Using wet hands, form the cookies or cookie bites and place onto the lined baking trays.
  8. Bake in the oven for 10-13 minutes.
  9. Let the cookies cool on the baking trays for a few minutes before cooling on a wire rack.  When they first come out of the oven they are very soft but firm up as they cool.

Enjoy!

big love

gollygoshgirl

xx

healthy homebaked chocolate chip cookies (yep; you heard right!)

Photo 14-06-2013 23 45 47

Healthy Homebaked Chocolate Chip Cookies

To cut a long story short; I’ve been throwing myself a pity party for the past week.  I was told I can’t eat gluten, dairy, eggs or yeast for the foreseeable future – possibly forever.  My favourite foods flashed around a conveyor belt in my mind (desserts featuring pretty highly), quickly followed by the realisation that I needed to find some good substitutions as speedily as possible!  All recipes I could find for cookies and cakes seemed to want me to grind nuts (not gunna happen considering that my trusty £5 electric whisk from Argos is my only real equipment) or require a massive amount of substitute ingredients which aren’t readily available or affordable.  I stumbled across the original recipe on pinterest and emailed it to myself but  I cannot for the life of me find the source (if anyone knows it please get at me!).  As usual, I have  made a few little changes – my version is below!  These come out pretty rich but you know what? They also taste surprisingly good!

Ingredients

Makes 16 cookies

  • 1 small Avocado
  • 3/4 cup Honey (for vegans substitute honey for 1/2 cup agave nectar, 2 tbsps soya milk and 1 mashed banana)
  • 1/2 cup Soft light brown sugar, packed
  • 2 tsp Vanilla extract
  • 2 cups Rice flour
  • 1/2 cup Cocoa powder
  • 1/2 tsp Salt
  • 1/2 tsp Bicarbonate of soda
  • 1/2 tsp Cornflour (UK) or cornstarch (US)
  • 2 tbsps Soya milk
  • 1 and 1/2 cups dark chocolate chips (70% cocoa solids)

Method

  1. Slice, pit and mash the avocado.
  2. Place the avocado into a mixing bowl and combine it with the honey.
  3. Add the sugar, soya milk and vanilla extract, mixing until combined.
  4. In a separate bowl sift together flour, cocoa powder, chocolate chips, salt, bicarbonate of soda, baking powder and cornflour.
  5. Slowly mix in the wet ingredients a little at a time.
  6. Chill in the fridge for 2-36 hours.
  7. Preheat the oven to 180ºC/350ºF/gas 4
  8. Line your baking trays with greaseproof paper
  9. Roll the mixture into mounds the size of a heaped tablespoon and place onto the baking trays lined with greaseproof paper.
  10. Flatten the mounds of mixture slightly, creating discs.
  11. Bake in the oven for 10-13 minutes.
  12. Let the cookies cool on the baking trays for 5 minutes before transferring to a wire rack to cool.

Enjoy!

big love

gollygoshgirl

xx

baked red peppers stuffed with goodness

Photo 12-06-2013 21 29 37

Baked Red Peppers Stuffed With Goodness

These.  Are.  Yummy. Fact.  AND they’re super full of nutrients to make your body smile from the inside out!

Since embarking on a quest for healthy goodness at the beginning of April one major thing I’ve noticed (probably very belatedly compared to everyone else) is how many cheeky little unhelpful added extras there are to food that I had thought was pretty good for me!  I’ve certainly discovered the value (and reaped the results) of cooking from scratch using only the good stuff!  It took a fair amount of scouring food labels at the start but I’ve started to work out what is literally what it says on the tin and what is actually a chemically or sugar enhanced flavour.  And my tastebuds can now certainly notice the difference!

The problem is, you don’t want to sacrifice flavour (I wouldn’t have the willpower to anyway!) in pursuit of nutrition or it will make you miserable and simply crave the taste of sugar and fat.  So I started to experiment a little bit with foods I know are full to the brim of nutrients and other goodness, and to come up with meals that taste yummy, are within my price range and that I can prepare in bulk to freeze in my trusty tupperware.

These are my current favourite (recipe below) but my meal prep also includes yummy, filling and crazy healthy stir frys and super food salads amongst others for lunches to take to work.

Ingredients

  • 6-8 Red bell peppers
  • 800g Lean turkey mince or lentils
  • 100g Quinoa
  • 400ml Carton of passata
  • 400ml Can of mixed pulses
  • 175g Can of sweetcorn
  • 2 Sweet potatoes
  • 150g Butternut squash (optional)
  • 2 Cloves garlic
  • 1 Onion
  • Oregano (fresh or dried)
  • 50g Kale, Spinach or a mixture of the two
  • Lemon juice

Method

  1. Preheat the oven to 180°C
  2. Put the quinoa into a pan of boiling water for 15-18 minutes until cooked, then drain the water.
  3. Chop the sweet potatoes (and butternut squash if you have it) into small chunks (about 1cm big) then place them onto a baking tray lined with greaseproof paper.  You don’t need any oil – promise!  Don’t put them in the oven just yet – that comes a little later.
  4. De-seed and halve the red bell peppers (if using for meal prep you need to halve them to fit into tupperware – if you’d prefer them whole like in the picture then go for it – the recipe is the same!) and place them on a baking tray with the inside facing upwards.  Again, no oil needed.
  5. Chop the onion and garlic, then pop them into a frying pan on a medium-high heat with about 2 tablespoons of lemon juice for a couple of minutes
  6. If you are using meat add in the turkey and stir until cooked
  7. Add in the oregano
  8. Add the passata, mixed pulses, sweetcorn (and lentils if using) and stir for a few minutes
  9. Finally add the cooked quinoa and kale/spinach for a few minutes and stir well
  10. Spoon the cooked mix into the prepared bell peppers
  11. Place the baking trays with the bell peppers into the oven along with the baking tray of sweet potato and butternut squash.
  12. Cook for 30-35 minutes.
  13. Leave everything on the baking trays to cool for a couple of minutes then transfer the bell peppers to plates or tupperware.
  14. Add the baked sweet potato and butternut squash.

Enjoy!

big love,

gollygoshgirl

xx


homemade, all-natural and organic skincare

Photo 29-05-2013 10 54 11

Since embarking on my quest for healthy goodness I set myself a little challenge to revamp my skin and haircare routines and do beauty naturally.  I’ve already posted about going no ‘poo and hair-related things but realised I haven’t yet mentioned skincare.

Let me remedy that right now!

Since the whole natural haircare experience wasn’t so scary in the end, I decided it was time to trial organic, natural skincare.  Which was a MASSIVE step for me.  You see; I’m pretty darn protective over what goes onto my skin. For the past ten years my face has displayed the wonderfully attractive combination of extremely dry, peeling skin coupled with outbreaks all over the place.  Nice.  Doctors have been scratching their heads and referring me onto colleagues and specialists  and so on and so forth; you get the picture.  No amount of creams, dermatology or medication has had a positive impact so far.  In fact, normally within minutes I’d react to anything other than cold cleansing cream.  Even water would have an impact.

But after discovering how many toxic chemicals are in beauty products, cosmetics and skincare products (search yours on the  Environmental Working Group website and you’ll catch my drift) I reckoned maybe I should at least try going all-natural.

So all-natural I went!  And so far (2 months in) so good 🙂

Homemade, all-natural and organic skincare

The ‘recipes’ below are what works for me – if you’re gunna try it you may wanna adjust some of the quantities – it’s up to you!  I cleanse and moisturise my face every morning and night, use the oil cleansing whenever I take off make-up or every few days and use the face masque about twice a week before I get in the shower.

Cleanser

  • 1 part Apple Cider Vinegar (with the mother left in)
  • 2 parts water

Apply a little with a cotton pad.  It smells of vinegar (obviously) but only for a few seconds – don’t freak out!

Moisturiser

  • Argan oil

A tiny amount goes a long way – honest!  I use 2 squirts which is about the size of a 5p piece for my whole face and massage it in for a minute or so.  As with the cleanser don’t panic when it smells (this will be nutty though – not vinegary!) – the odour disappears within a minute!  Make sure the argan oil is 100% pure, cold-pressed and stored in a tinted (probably brown) glass bottle.  I bought the Truly Moroccan argan oil for £10 (the cheapest I could find for the quality) – I know it’s pricey but so far I’ve used about 1/4 of the 100ml bottle I bought 2 months ago, which works out at about £1.25 a month and THAT’S not too shabby!  AND I use it for the oil cleansing method!

  • Coconut oil

A-MAZ-ING.  Seriously. If you haven’t read 300 versions of ‘100 uses for coconut oil’ doing the rounds on pinterest, blogs and other sites check one out.  Coconut oil is awesome.  Just not for you face – it clogs the pores!  The rest of your body, however, will flippin’ love it!  It smells yummy, is soooo good for your skin and again a little goes a long way! Make sure to buy cold-pressed organic virgin coconut oil – I use Coconoil organic virgin coconut oil which was £10 for 465g and lasts FOREVER!

Face Masque

  • 1 part Raw organic honey
  • 1 part Apple Cider Vinegar (with the mother left in)
  • 1 tbs fresh lemon juice

Mix this all together and apply to your face.  It smells amazing!  Leave on for 15 minutes then wash off.  Enjoy silky soft skin!

Oil Cleansing Method

  • Argan oil
  • Flannel face cloth

This sounds kind of strange but it works – oil dissolves oil and the hot flannel means that you are effectively steaming your face and opening your pores which helps them clean out!

  1. Wash your face with the flannel then pat it dry with a towel
  2. Run the flannel under hot water (dont go crazy and scald yourself but as hot as you can handle), wring it as dry as possible and place it over your face until it cools down.
  3. Massage argan oil into your skin for a couple of minutes.  I use 4 squirts or about the size of a 10p piece.
  4. Repeat step 2.
  5. Once the flannel is cool, use it to gently wipe your face
  6. Rinse the flannel and repeat steps 4 and 5
  7. Allow your skin to air dry.  I then massage a small amount or argan oil into my skin as a moisturiser, but that’s optional!

Voilà! Lovely soft skin 🙂

big love

gollygoshgirl xx


homemade, all-natural and organic haircare; the No ‘Poo method

SWJY_8G8ENOahG848adMfmj7Z4qnuVJyZfTglCVN4zI O-2oPHsxYZ841G63L89ciGiv5C2zZg-Nf2UZLrCa2gY xx-46Re-tEhKr-oIfIByXsW3ZhzEZ3fUfA5F2F4-aXk KZMIAsaVHvnN5aOtLoN4og0gAfxhz6CSVxjEu3CvaLg

Since embarking on my quest for healthy goodness I set myself a little challenge to revamp my skin and haircare routines and do beauty naturally.

Leading me onto my next point; I have a confession.  I haven’t ‘pooed in over a month.

I’m talking SHAMPOOED.  I haven’t SHAMPOOED in over a month.  (Fear not; I solemnly promise that I will never share my bowel movements with the whole of cyberspace.)

Anyway; what I was trying to say is that since mid-April I have not put any chemicals in my hair.  That’s not to say I haven’t cleaned my hair; just that I have used homemade natural, organic goodness rather than the toxic substances I was using before.  Think that’s a pretty extreme statement?  Check out the toxic levels in any of the haircare, skincare or cosmetic products you use right here and make up your own mind.  The website I’ve just directed you to is the Environmental Working Group’s cosmetics database and they rate ingredients and products in relation to the hazard to your health or the environment.  They also detail what the hazards are.  Pretty nifty ey?

Other good reasons to go no ‘poo;

  • More body
  • Easier to style hair
  • Less oily hair
  • Less frizz and fly-aways (great for curly haired ladies)
  • Added shine
  • Quicker growth
  • Stronger hair
  • Safe for dyed hair
  • Great for grey hair (commercial shampoos can cause grey hair to yellow – boo!)
  • Fewer hair washings, as your scalp will no longer be over producing oils
  • No chemicals on your hair, scalp or washing down the drain (Win!)
  • More money in your pocket – baking soda and apple cider vinegar are crazy cheap compared to commercial products (Massive win!)

Below are the ‘recipes’ I use for my hair and a little bit about how I’ve found the transition to ‘no poo’.  The reason I’ve left it a month before I posted about this is that I wanted to see for myself if it would actually work for me and be able to give you a balanced honest review of what happened – hopefully you’ll find it helpful!  There are so many variations on how people transition that if you fancy giving the whole ‘no poo’ thing a go I recommend doing some research and finding people with similar hair to yours and starting with what works for them.  Alex Raye’s blog has lots of info on natural haircare and for a detailed explanation of the transition to the no poo method I found Leah’s explanation really helpful. There are also many, many other bloggers and pinterest-ers who offer their own experiences and advice and are worth checking out!

So without further ado may I present to you….(drumroll please)…

Homemade, all-natural and organic haircare; the No ‘Poo method

Photo 29-05-2013 10 55 39 -YXIs_fOBivCSblQCm3gkqjGY_uFt24ETotZA9JUFWA Photo 29-05-2013 10 53 49

Before you start you need to clarify your hair.  Most commercial products have silicons in them, which will remain stuck to your hair unless you clarify.  If you don’t, you’ll end up in the pretty gross situation I got myself into where your hair literally looks wet even hours after you wash it.  Yuk!  My only regret in the whole process has been that I didn’t realise I should have clarified before I started and carried on for a week before I discovered this vital step!  I used a paste of Bicarbonate of Soda mixed with a little water and covered my hair in it, left it for 20 minutes then washed it out.  Easy peasy!

Every other day I washed my hair with a ‘shampoo’ alternative of 1 tablespoon of bicarbonate of soda mixed with 1 cup of water.  The ‘conditioner’ I used was 1 tablespoon of apple cider vinegar (ACV) with the mother left in (don’t worry it’s nothing weird – Google it and check!) with 1 cup of water.  How cheap and cheerful is that!?! First off don’t expect it to have the consistency of commercial products.  It literally feels like you are putting water into your hair.  Also, invest in a couple of squeezy condiment plastic bottles with narrow tips – makes such a difference in being able to reach all of your hair – especially close to the scalp!

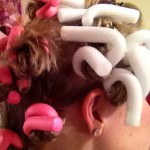
I have long blonde, fine hair that is naturally straight.  I only washed my hair once a week (and dry shampooed it once between washes) before transitioning to no ‘poo so I don’t know if that helped my hair to adjust well, if I was just lucky or if I has just totally overestimated how horrible my hair would get!  Apart from the first week (where I hadn’t clarified my hair), I had a couple of days where my hair looked a bit greasy but nothing too dramatic.  I used the homemade dry shampoo once during the whole transition (it’s best to avoid using it during this period) and wore my hair up or curly using the no heat curls method on the few days I felt it looked a little greasy, which worked pretty well!  I now wash my hair two or three times every fortnight using the bicarbonate of soda mixture in the roots of my hair and ACV mixture in the tips and don’t have any problems!

As for hair masques, once a week it is recommended you use a natural hair masque on your hair.  There are SO many recipes out there that, as I said before, it’s best to find out what works for your hair so get researching!  The first one I tried was a disaster.  I used coconut oil and I think it is just too heavy for my fine hair.  My hair went back  to the wonderful wet look stage I told you about before I clarified my hair – big fail!  I know coconut oil works for a lot of people but apparently not me!  I had to ‘clarify’  my hair again right after to get rid of the residue gunk!  What has worked is using equal parts ACV and raw organic honey on the tips of my hair (NOT the roots – that makes my hair look greasy).  After leaving it in for 20 minutes, I wash my hair as usual with the bicarbonate of soda and ACV mixtures.  Simple!

The only other thing I do to my hair is use a boar bristle brush (it helps distribute the hair’s natural oils evenly) and a wide toothed comb after washing or when I need to tame it into some sort of style!

I’d love to hear your feedback on the no ‘poo method or what’s worked for you – please feel free to get in contact! 🙂

big love

gollygoshgirl xx

no-heat curls

294843_10151681801894714_1070349454_n 

As part of my quest for healthy goodness I not only set myself a nutrition related goal but also a little self-imposed natural beauty challenge.

Over the past month I have stopped using chemicals and other nasty things on my hair and in my skincare routine.  One such ‘nasty thing’ being subjecting my tresses to pretty elevated temperatures in an effort to coax them into different styles.

Now; in once sense I am pretty lucky – my hair naturally dries pretty much poker straight. Which I am very appreciative of.  Honest! However a drawback of this is that should I wish to add any volume or attempt to create a different style; its impossible to achieve without heat (hairdryer, straighteners…you get the gist).  And even then my hair will return to its natural state within hours.

Until now.  May I present to you (drumroll please); no-heat curls!

Simply purchase some foam-covered wire rollers (pictured below) and wrap n roll your wet hair around them!  I got 8 for £1 from Primark and 12 for 99p from the 99p Store so obviously they are pretty inexpensive – bargain!  I like to have a quiff and also have shorter layers of hair around my face so use a medium conventional roller for the middle of my parting (as you can see in the photo).  The less hair you use on each foam roller, the tighter the curls will be.  Also, if you twist your hair before you wrap it around the roller you get a more beachy/wavy outcome.  I wash my hair and sleep in the rollers or leave them in for a few hours so you do need to plan this look a little in advance!  The best part is that the curls actually stay in for a few days (although admittedly they become more waves than curls).

The photos above are of my hair naturally and then the day after using the foam rollers.

Below are photos of the rollers as I use them and my hair 2 days afterwards.

179128_10151681825184714_1681934265_n    

 942723_10151681828744714_184080121_n

scrummy super salad

375024_10151695545064714_1253170321_n

Since I started living with boys it has been my personal mission to attempt to introduce a little bit of greenery to their meat (I mean; meals).  This salad is now known as the ‘MAN SALAD’ and is just about one of the only leaf-based dishes that the boys deem fit to enter their stomachs.  I love it – it’s full of nutrients and little blessings for my insides, which slots quite nicely into my quest for healthy goodness.  I personally mix and match whatever I have in the fridge and store cupboard, but the items with the * are the ones which the boys say make it MAN SALAD worthy.

Ingredients;

  • Spinach, kale, lettuce or a combination of the three (make sure to chop or tear the leaves as more enzymes are produced – good stuff!)
  • Sliced plum, strawberries, blueberries, grapes or a combination of all of them *
  • Cucumber
  • Baked sweet potato chunks (literally chop sweet potato into little chunks, bake it in the oven for 40 minutes at 180 degrees Celsius and voilà! No added fat, salt or other nasty stuff needed!) *
  • Red bell pepper
  • Cherry tomatoes
  • Pine nuts
  • Cashew Nuts (raw and unsalted) *
  • Desiccated coconut *
  • Mixed seeds (I use pumpkin, sunflower, sesame, flax and whatever else comes in the mixed seed pots I buy) *
  • Grated lemon zest *

I don’t ever feel hungry after eating this (in fact; quite the opposite) but if you wanted extra protein or to bulk it out you could add turkey breast, tuna, hard boiled egg or a can of mixed beans (red kidney, black eye, borlotti, baby green lima and pea navy are my choice!)

You can check out more yummy healthy recipes here if you fancy it!

big love

gollygoshgirl

xx

homemade dry shampoo; crazy cheap AND free of nasty chemicals!

Dry shampoo is one of my favourite products but after deciding to try to use fewer chemicals and utilise a bit more of nature’s helping hand with my skin, hair and beauty routines (you can read that post here) I thought this would be as good an item to start with!  The brand I use also has a pretty high hazard rating (if you don’t know what I’m on about and want to find out check out the link above) so all the more reason to try something new!  I got this little recipe from Alex Raye’s blog – definitely worth a peek if you’re interested in looking to do beauty naturally as she has great tips, sound advice and is happy to answer questions!

Photo 23-04-2013 22 27 59Photo 23-04-2013 22 28 47

homemade dry shampoo

  • 1 part bicarbonate of soda
  • 1 part cornflour
  • cocoa powder optional depending on hair colour (being blonde I didn’t use any)

Mix together and rub a small amount into hair where wanted.

Just as good as the stuff I was using before – if not better 🙂  Brilliant!

big love

gollygoshgirl xx


yummy, filling and crazy-healthy stir fry recipe

602102_10151630224064714_922952908_n

To be honest, this is pretty adaptable so just add in whatever tickles your fancy! It can be vegan, fat-free, gluten-free, dairy-free, nut free (you get the picture)….pretty darn good ey?!?

I am very much on a budget so it’s often cheaper to choose certain ingredients over others (for example beans rather than turkey and whatever veg is on offer or in season). Buying frozen vegetables is also cheaper than fresh and they tend to retain more nutrients; win! I buy Fairtrade where possible if I’m not buying local – sometimes a teensy bit pricier but SO worth it to ensure fair working conditions for those who produce it. Add in as much variety as possible of veg – the more colours you use the more nutrients you’re adding (it’s ALL about ‘eating the rainbow’)!

This truly does fill me up and I regularly eat it for lunch. I usually make enough for at least 8 meals and freeze them ready for the week. That way I can alternate them with other meals I’ve pre-prepared and frozen so I don’t feel like I’ve eaten exactly the same thing every day (which, let’s face it; no one wants to do!)

Simply use lemon juice to fry off the onions and garlic then add your ingredients in whatever order you prefer, adding in lots of soy sauce and some coconut milk or passata to taste. I usually use 1 can of coconut milk or passata between 8 servings, but it depends on your preference and portion size really!

Ingredients;

  • Soy sauce (gluten free if needed)
  • Lemon juice
  • Coconut milk OR passata (sieved tomatoes) – make sure you buy 100% tomatoes – no added salt, sugar or other cheeky extras
  • Turkey breast (diced) OR a can of mixed beans (red kidney, black eye, borlotti, baby green lima and pea navy are my choice!)
  • Cauliflower
  • Broccoli
  • Green beans
  • Curly kale
  • Spinach
  • Courgette
  • Onion
  • Garlic
  • Red and/or green bell pepper
  • Cherry tomatoes
  • Peas (I love petit pois)
  • Pak choi
  • Cashew Nuts (raw and unsalted)
  • Desiccated coconut
  • Mixed seeds (I use pumpkin, sunflower, sesame, flax and whatever else comes in the mixed seed pots I buy)

big love

gollygoshgirl

xx

oooh and if you wanna see more tasty healthy recipes just click here 🙂

leg scrub; smooth, silky and waaaaay better than a spa!

I have to say I’m pretty pleased to announce that my first foray into homemade natural beauty products has actually paid off (thankfully) – I’m not quite sure how well I would have coped with discouragement at the first hurdle!  Say HELLO to gorgeous feeling legs!

Photo 23-04-2013 21 36 09Photo 23-04-2013 21 37 50Photo 23-04-2013 21 37 01

natural homemade leg scrub

  • 1/2 cup oil (I used coconut as it smells amazing and is ridiculously good for your skin; but you can use any!)
  • 1/4 cup sugar
  • 3 tablespoons citrus juice (I used lemon)

Mix everything together in a pot or bowl.

Soak in the bath or have a shower and shave your legs as normal.

Use some of the mixture to rub over one leg, massaging the mixture in.  The sugar will help rub off dirt and dead skin.

Rinse the mixture off then shave again.

Rub some mixture onto the same leg and rinse off again.

Repeat the steps for the other leg.

Dry your legs and moisturise as normal (I use coconut oil)

SO GOOD! 🙂

big love

gollygoshgirl xx

beauty; naturally! (a little challenge)

523647_10151248897844714_826416087_n

So after deciding that it was time for a little health overhaul I realised that I had started paying pretty close attention to making sure I’m filling my body with goodness.  Obviously a big step forward on the journey, right?

But then I had a little think and came to the conclusion that healthy goodness does not simply involve what I eat (or don’t) and how much I exercise – oh no; it’s not just what I put into my body that counts – I put a lot of stuff onto it too!

If consuming fewer unprocessed foods, chemicals and additives has had a positive impact on my body from the inside; then I’m willing to bet that if I treat the outside in the same way I might well get similar results! With the added bonus that it will not only benefit me (hopefully) but the environment too (definitely)!  PLUS it will work out way cheaper than the products I currently buy! Win!

Now there’s a website I stumbled across by a pretty cool organisation called the Environmental Working Group (you can find it right here).  They rate products based on their toxity and give them a rating out of ten as to how hazardous they are.  It’s really easy to use and simple to understand (phew)!  I may have got a little bit carried away and put almost every product I’ve ever used in there….be warned that some results are a bit of a reality check – lets just say it has encouraged me that trying natural beauty is the way to go!

And by natural beauty I in no way mean that I am planning on turning into a tree-hugging hippy with dreadlocks and a wardrobe full of tie-dye and rainbow coloured woven jackets.  Not yet anyway!

I’m simply going to seek out some ways of tweaking and adapting my skin, hair and beauty regimes so that I only use natural ingredients and products.  I’ll be posting the results so you can see how it all goes down – it’s gotta be worth a try for the sake of my pocket, my health and the planet!

Wish me luck………!

gollygoshgirl xx

A little footnote (added 20.05.2013) ;  if you fancy seeing how I’m getting on take a peek at these – I’ll update below as I go along! 🙂

natural, organic skincare,  the no ‘poo methodhomemade dry shampoo,  natural leg scrubno-heat curls and plenty more to come!

one week down…and i’m still on the wagon!

Well, after just one week I am pleased to announce that I have noticeably slimmed down.  My wrists and the bridge of my nose have definitely reduced in size.  Resulting, rather attractively, in my watch (already a children’s one) needing to be one notch tighter and my glasses falling down my nose.  Brilliant.

On a serious note, I have actually lost a few centimetres here and there and a kilo or two.  Which is pretty encouraging.  What is even better, though, is that I haven’t lived in a permanent state of hunger (or any state of hunger at all)  and yet have only eaten healthy stuff all week.  And I haven’t even craved chocolate or ice cream… you could say I’m feeling the love for all this yummy healthy goodness!

Before we get down to business and I attempt to give a slightly more balanced review of the past seven days than what is written above I think a few photos are in order;


As you can see I haven’t exactly suffered (and thank the Lord for that or I wouldn’t still be sticking around for week 2)!

Now as I said in my last post on this subject; I’m not interested in fad diets or quick results that will be easily reversed the minute I catch a whiff of anything that I might actually enjoy eating – I want to give myself a little health overhaul and create a lifestyle that is better for my physical health as well as my figure.  I reckon life is too short to be miserable, and seeing as I love food: I refuse (OK, more like am completely unable) to feel starving for the rest of my time on earth.  Also, seeing as I spend a vast amount of time driving to and from work halfway around the M25 each day, I need to be able to eat breakfast in the car if morning traffic is rubbish and have snacks readily available for the way home.  Add to that the fact that I have very little time to prepare evening meals due to dance and other commitments and you can see how tricky I am to accommodate!

Luckily, I am blessed with some lovely friends, one of whom knows a highly regarded personal trainer who has already helped her parents become distinctively healthier.  I decided to follow the food plan that he gives because not only is it sensible and based on healthy nourishment for the body but I have also seen the results first hand.  It starts with a basic list of foods (that you can eat as much as you like of) and every 7 days for 6 weeks more are added.  Cheat meals and cheat days are also incorporated which allow for indulgence (which is obviously a BIG win in my book – Ben, Jerry and I still have a chance).

Although I know a healthy body is created in the kitchen, I am also very aware that exercise is also important.  I take dance classes and also use the Davina Fitness app to help me work out at home.  I use the Run 10k app when I go for runs (I’ve never actually done 10k but its a great app because it builds you up from literally nothing to being able to run for ages – and if it works for me it can work for anyone!).

A few things that feel noteworthy ( I in no way claim to be any expert or professional in this arena!):

  • Social media can be a great way to find motivation, tips, recipes and encouragement – think Instagram, Pinterest, Facebook, Twitter and blogs to name but a few.  Just a small warning; it can also be a hub of unhealthy advice so choose your sources wisely!  A few that I really rate are http://instagram.com/fitmencook , http://instagram.com/mealprepmondays  and                                                      https://www.facebook.com/pages/Thehealthkitchen/107155876143322
  • Fitness doesn’t have to cost anything.  As I said, I downloaded apps onto my phone to help with workouts and running as I can’t afford the gym.  There are also YouTube tutorials which are pretty good!  Other low cost and sociable ways to keep active could include workout DVDs, sport in the park with friends (not exactly an inspiring concept given the weather at present but we can live in hope), walking, sightseeing, finding an open air swimming pool, trying a dance class, wakeboarding or waterskiing, skateboarding, cycling, ice skating, indo boarding, fruit picking to name a few.
  • Recognise your achievements – even if they’re only little at the beginning – and don’t reward yourself with anything food related! Seeing as I lasted a whole week without succumbing to the lure of the biscuit tin I got myself a gorgeous new nail varnish and spent a couple of hours doing my nails while watching one of my favourite films.  At the end of week 2 I’m going to get myself some hair products.  If I’m still on track at the end of 6 weeks I have my eye on some gorgeous pink Adidas joggers designed by Jeremy Scott.  Another idea I’ve heard is putting £1 in a jar every time you work out and after 100 workouts using the money to really treat yourself.   I have to admit that I have seriously thought about buying a 1kg bag of sugar each time I lose a kilo so I can visually see the amount I’m losing!
  • Fail to plan, plan to fail.  Meal preparation is essential.  As is researching menus in advance of any restaurants you visit.  Planning how to handle social situations relating to food or alcohol and how/when you tell friends and family about your changed lifestyle really helps too!

big love,

gollygoshgirl xx

embarking on a quest for healthy goodness

Image

Let me start by saying this: I love cake.  And ice cream.  A lot.

Apart from the effect on my waistline there is nothing I don’t like about them.

Ben and Jerry are two of my favourite men in the world – I reckon they deserve a medal: not only do they provide a stellar (and very much appreciated) service to comfort eaters everywhere,  but the brand has awesome morals and pretty darn good ethics to boot!

HOWEVER, as much as I could wax lyrical about the fact that I enjoy food (and I really, REALLY do), I think it’s time for a little health overhaul.  Which, unfortunately, means that I will be seeing a lot less my two favourite men above (sorry guys).

I love veggies and eat pretty well with the exception of a few calorie fueled desserts.  I dance regularly (classes; not the weekend type brought on by a few beverages) and manage a few runs a week when the sunshine makes an appearance –  but apparently my body doesn’t think that’s good enough to protect my arms from the horror of the dreaded bingo wings or to keep my waistline in check.

Saying that, and although I’m certainly no fitness poster girl, I am also aware that I’m not obese. This fact does become slightly difficult to remember, though,  when the friends you are blessed to be surrounded by are not only gorgeous on the inside but pretty darn beautiful on the outside too.

Due to the wonderful creation of Facebook,  self esteem can be assaulted just by logging on – and photographic evidence of every second of your life has the wonderful potential to be scattered across the Internet in pictorial splendour for ever more, often plunging even the most confident socialites into a bout of serious detagging. (And thank GOODNESS for the untag button – whoever came up with that deserves a medal too.  I’ll add them to my hypothetical list.)

Back to the topic.  I don’t just want to go on some fad diet and lose the will to live after surviving on lettuce leaves for three weeks; I want to find an attainable, sustainable lifestyle that makes me feel as good on the inside as i’ll (hopefully) look on the outside.  And seeing as willpower is not one of my strengths, I’m going to have to find some creative ways to keep myself motivated…

…which leads me to the reason I’m now making it official and blogging about my quest for better health; I need to keep myself accountable.  If I can manage to kid myself that people might read this I’ll probably end up staying a lot longer on the bandwagon and be less likely to become best buddies with those wonderful ice cream creators (I’m beginning to miss them already).

Wish me luck!

big love

gollygoshgirl xx

p.s. I’ve also set myself a little natural beauty project – click here to take a little peek and find out more 🙂